[Guide] How to get deploy working on Linux
-
At present, by default, you cannot deploy an app to your watch from a system running Linux. This guide will show you how to set up a Windows virtual machine (VM) with Bluetooth (BT) passthrough, high performance, and a shared folder with the host system.
I’m using a laptop with (A) a built-in PCIe BT device, (B) Ubuntu 25.10, and (C) the GRUB bootloader. What this means for you:
(A) Run the following in a terminal emulator:
lspci -k -nn | grep -A3 -i bluetoothOn my system it outputs this:
00:14.7 Bluetooth [0d11]: Intel Corporation Device [8086:a876] (rev 10)
        Subsystem: Intel Corporation Device [8086:000e]
        Kernel driver in use: btintel_pcie
        Kernel modules: btintel_pcie
If you get nothing, then your BT adapter is connected via USB. You can run ‘
lsusb’ to find it. What this means though is that:- You can skip the parts of this guide that talk about binding to VFIO and PCIe
- You need to figure out the BT passthrough part yourself. Fortunately, with USB the process should only include a simple click of a button once the VM is running. There should be plenty of guides online, for example this one.
If your output resembles mine, you need to write down three parts, which are:
- The address xx:yy.z, which for me is 00:14.7
- The Vendor:Device ID, here 8086:a876
- The driver, so btintel_pcie
(B) I’ll be using the package manager ‘
apt’. Your system might have a different one with differing package names. Adjust accordingly!(C) I’ll be adding two kernel parameters to GRUB’s config. If you have a more ‘‘exotic’’ bootloader, you should know where to put those instead.
A word of caution
Your device is your responsibility. I’m personally using this method, but anything may always happen. Always be careful
")
Furthermore, you will temporarily lose BT on the Linux side. You can always roll back with:
sudo rm /etc/modprobe.d/vfio-bt.conf
sudo rm /etc/modprobe.d/blacklist-bt.conf
sudo update-initramfs -u
sudo reboot
Additionally, if you let the VM enter a sleep mode, it may require a reboot for BT to start working again. Similarly, if your host system goes to sleep, then the whole system may require a reboot for BT functionality.
Let’s go
1. Enable IOMMU
Your hardware should support virtualisation, but it isn’t always enabled by default. You may have to go to your BIOS/UEFI and enable VT-d/AMD-Vi/SR-IOV/IOMMU or whatever else they call it there. Once done, edit GRUB, for example with nano:
sudo nano /etc/default/grubFind the line with ‘
quiet splash’ and adjust it:GRUB_CMDLINE_LINUX_DEFAULT="quiet splash intel_iommu=on iommu=pt"Of course, if you have an AMD CPU, write ‘
amd’ over ‘intel’. The ‘pt’ stands for ‘passthrough’.Update GRUB and reboot:
sudo update-grub
sudo reboot
Then verify:
find /sys/kernel/iommu_groups/ -type lAmong the output, I get
/sys/kernel/iommu_groups/13/devices/0000:00:14.7where you can see a familiar address at the end. The device is alone in its group, which is excellent, since that group will be lost to the host. If you BT is grouped with other things, it might be wise to abort this tutorial, since I cannot tell what other important stuff this group might include. Perhaps get yourself a cheap BT dongle instead
2. Install the goods and update your rights
sudo apt update
sudo apt install \
  qemu-kvm libvirt-daemon-system ovmf \
  libvirt-clients virt-manager virtiofsd
After which:
sudo usermod -aG libvirt,kvm $USER
newgrp libvirt
Verify that the following returns an empty list:
virsh list --alledit: For the Arch Linux users out there
 , the right packages are
qemu-desktop libvirt virt-manager edk2-ovmf virtiofsd dnsmasqand on Arch Linux you need to manually enable these:
sudo systemctl enable --now libvirtd
sudo virsh net-autostart default
sudo virsh net-start default
3. Bind Bluetooth to VFIO
Again, skip to chapter 4 if you do not have a PCIe device. After this point, Linux will become “blind” to the presence of the BT hardware.
3.1 Load VFIO modules
Edit
vfio.conf:sudo nano /etc/modules-load.d/vfio.confvfio vfio_pci vfio_iommu_type1 vfio_virqfd3.2 Bind the BT device
Create a modprobe config with your Vendor:Device ID:
sudo nano /etc/modprobe.d/vfio-bt.confoptions vfio-pci ids=8086:a876 disable_vga=1Then blacklist the native driver:
sudo nano /etc/modprobe.d/blacklist-bt.confblacklist btintel_pcieUpdate initramfs and reboot:
sudo update-initramfs -u
sudo reboot
3.3 Verify
Run
lspci -k -nn | grep -A3 -i bluetoothagain.
You must seeKernel driver in use: vfio-pci.
4. Create the Windows VM
This chapter will include some screenshots for clarity.
You’ll need to download a Windows iso file.
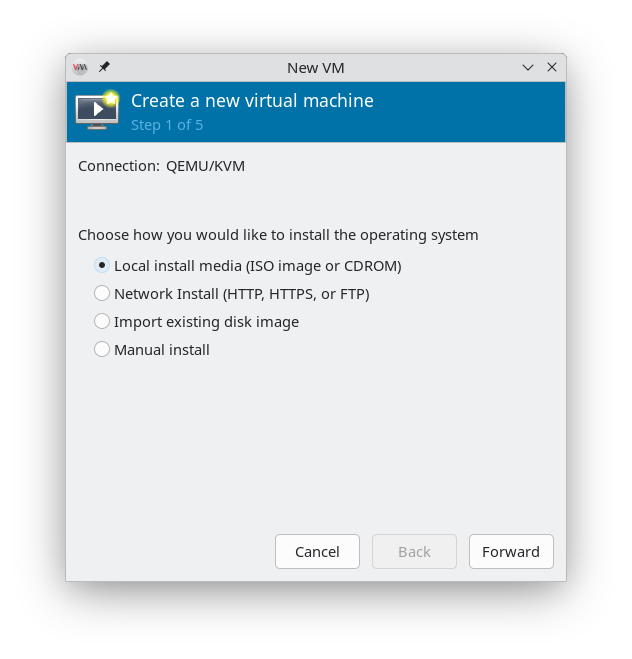
I went with Windows 10. Please note that Windows 10 is not supported by Microsoft anymore, so you should not use the VM for browsing sketchy sites. For performance, also get the latest virtio-win.iso.Next, launch virt-manager, which you installed earlier, and click the big button there to start the VM setup process.
Choose local install:
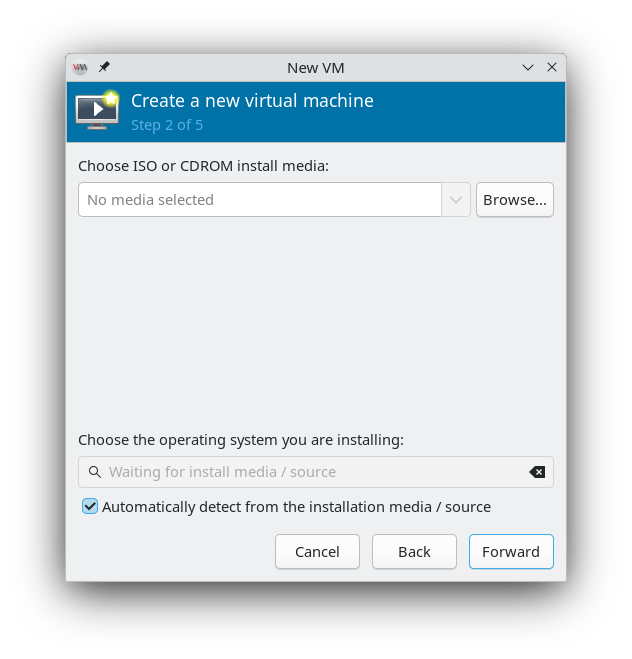
Then browse…:
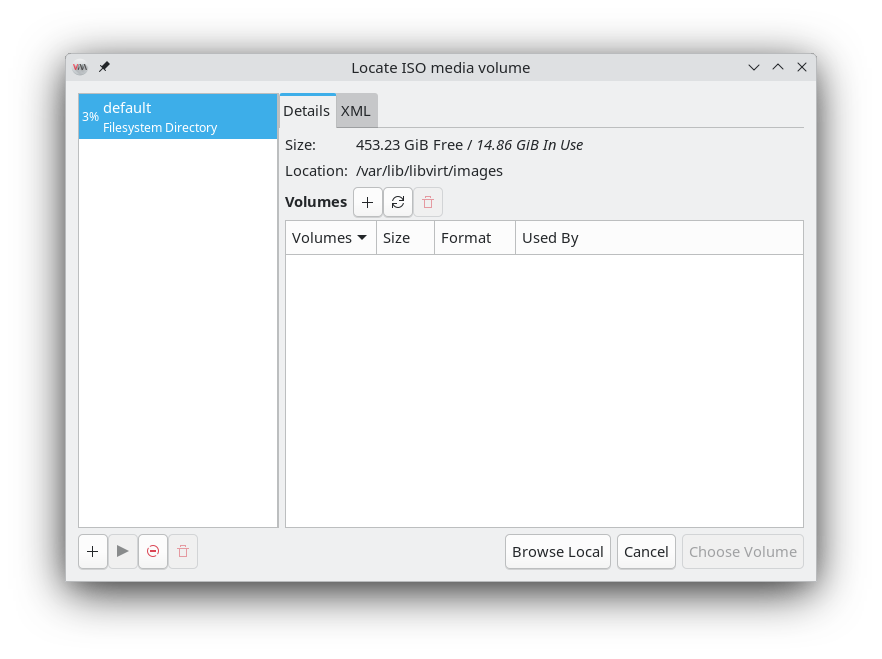
Browse local and find the Windows iso you downloaded earlier:
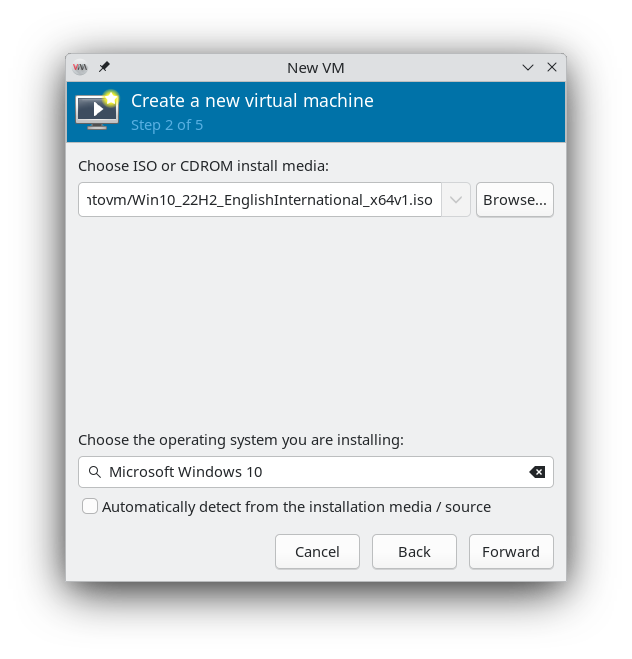
For me, the automatic detection insists it’s Windows 11, so I chose W10 manually:
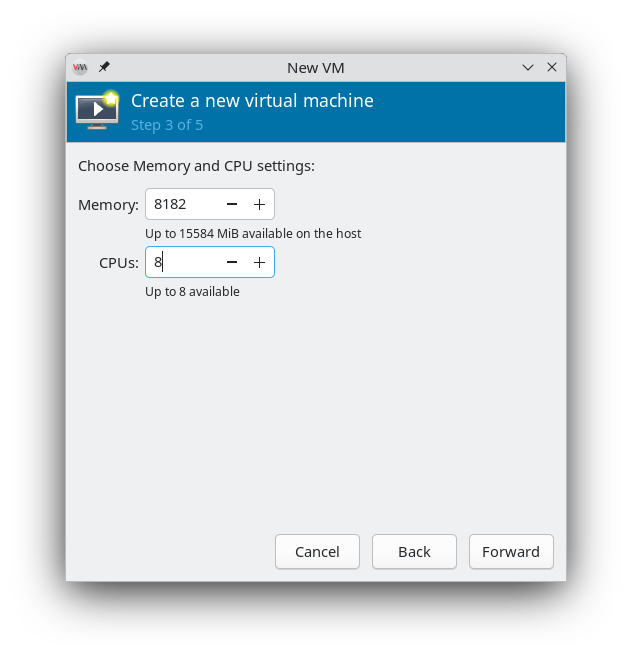
You’ll probably want to give this thing >= 8 GiB of RAM and plenty of CPUs. If the VM is running slow, you might see the SuuntoPlus Editor time out when trying to communicate with your watch. These settings can be changed later at any point:
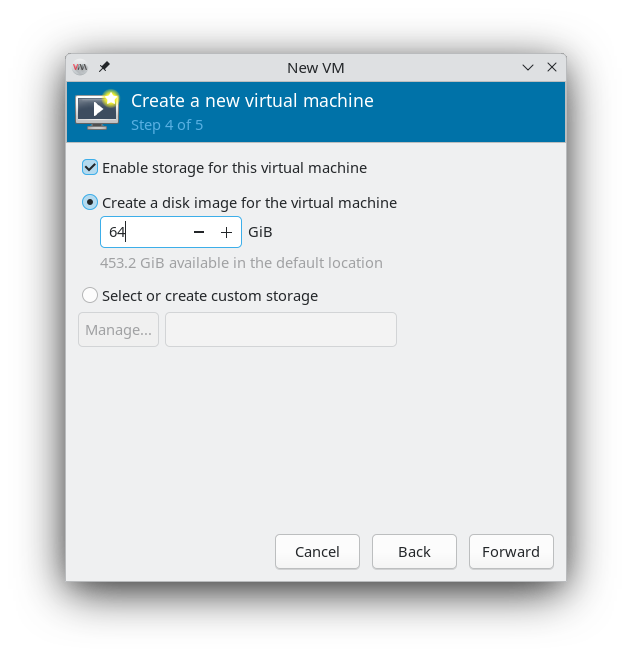
It will offer 40 GiB by default. I personally went with 64 to be on the safer side:
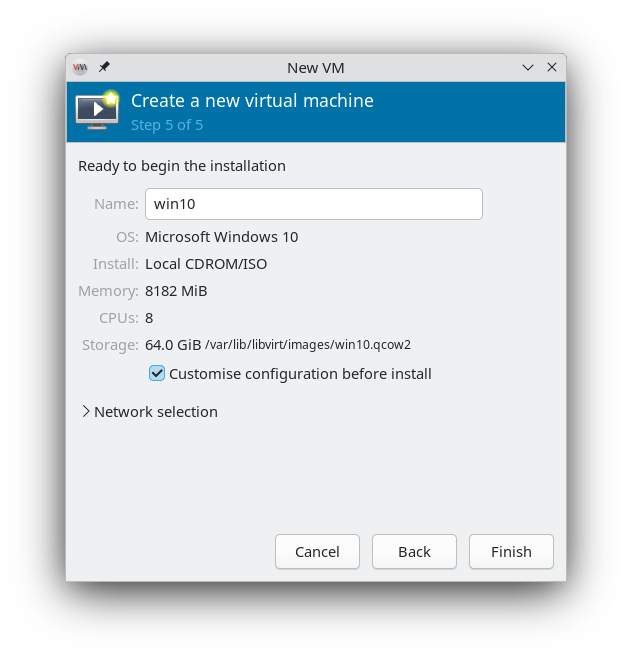
Important!! Check the option to customise before install:
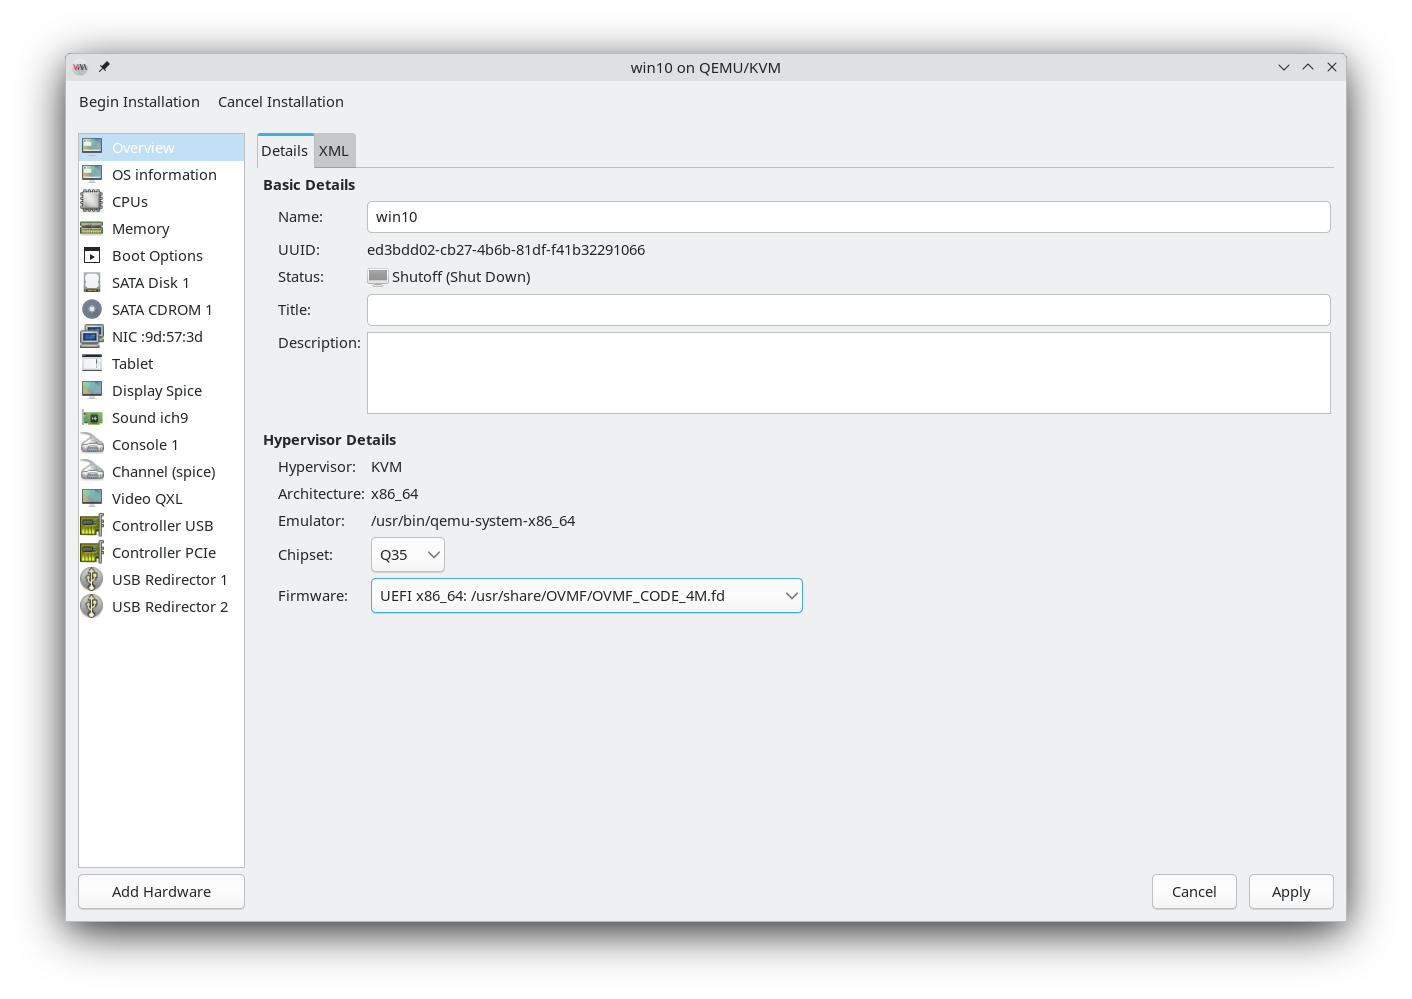
In overview, change firmware to OMVF_CODE_4M.fd:
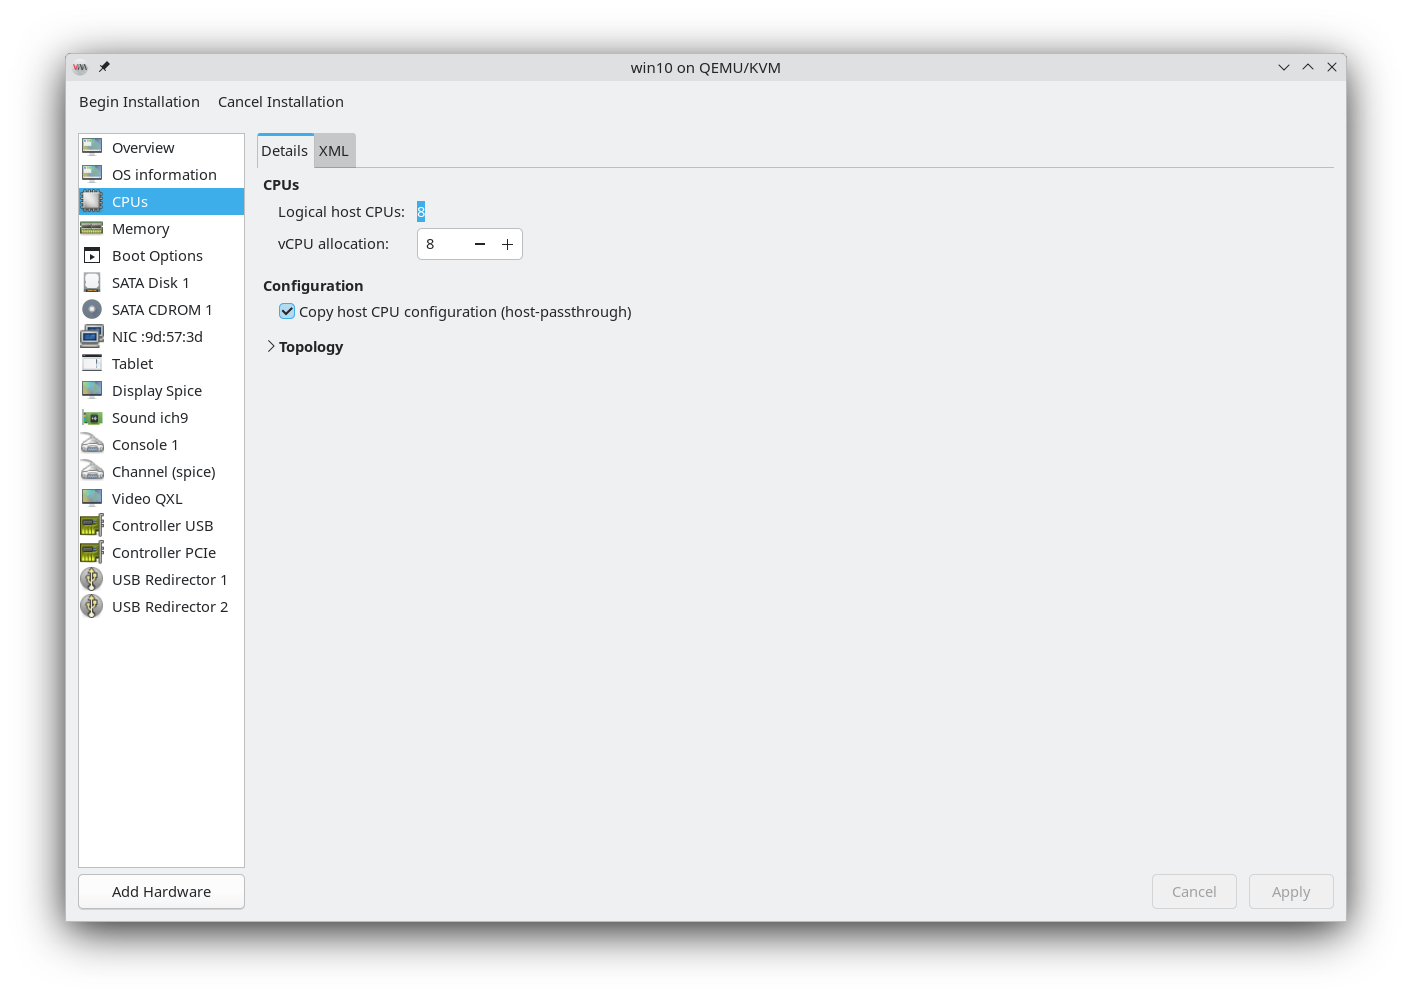
In CPUs, make sure the host-passthrough is checked:
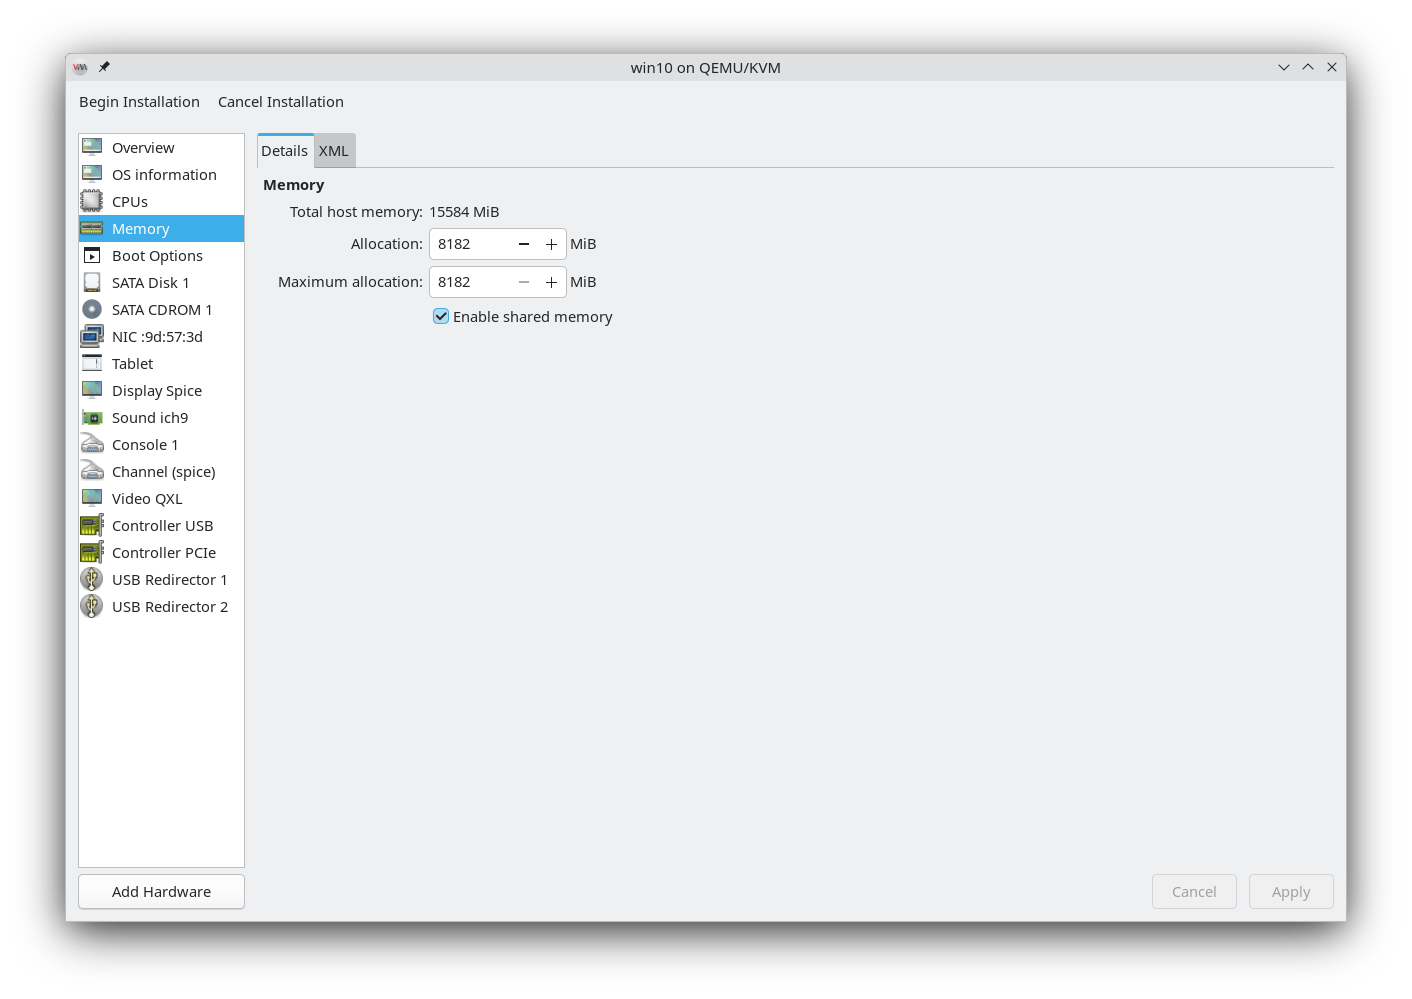
In memory, enable shared memory, which allows for a shared folder between the host and the VM:
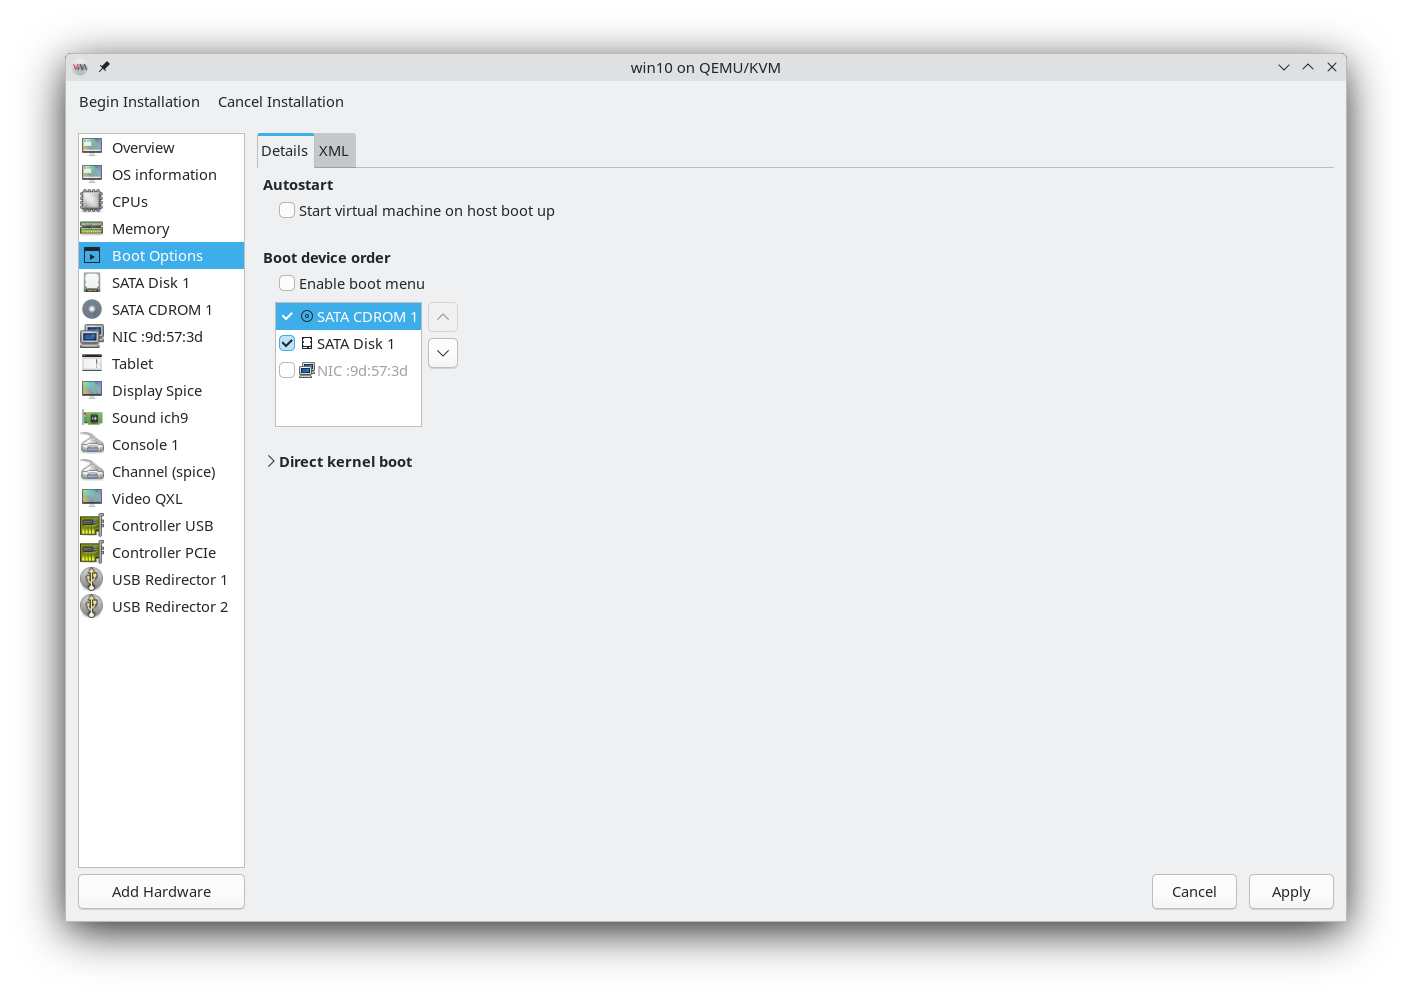
In boot options, check the CDROM and move it first or you will have a tough time booting:
In disk, change disk bus to VirtIO:

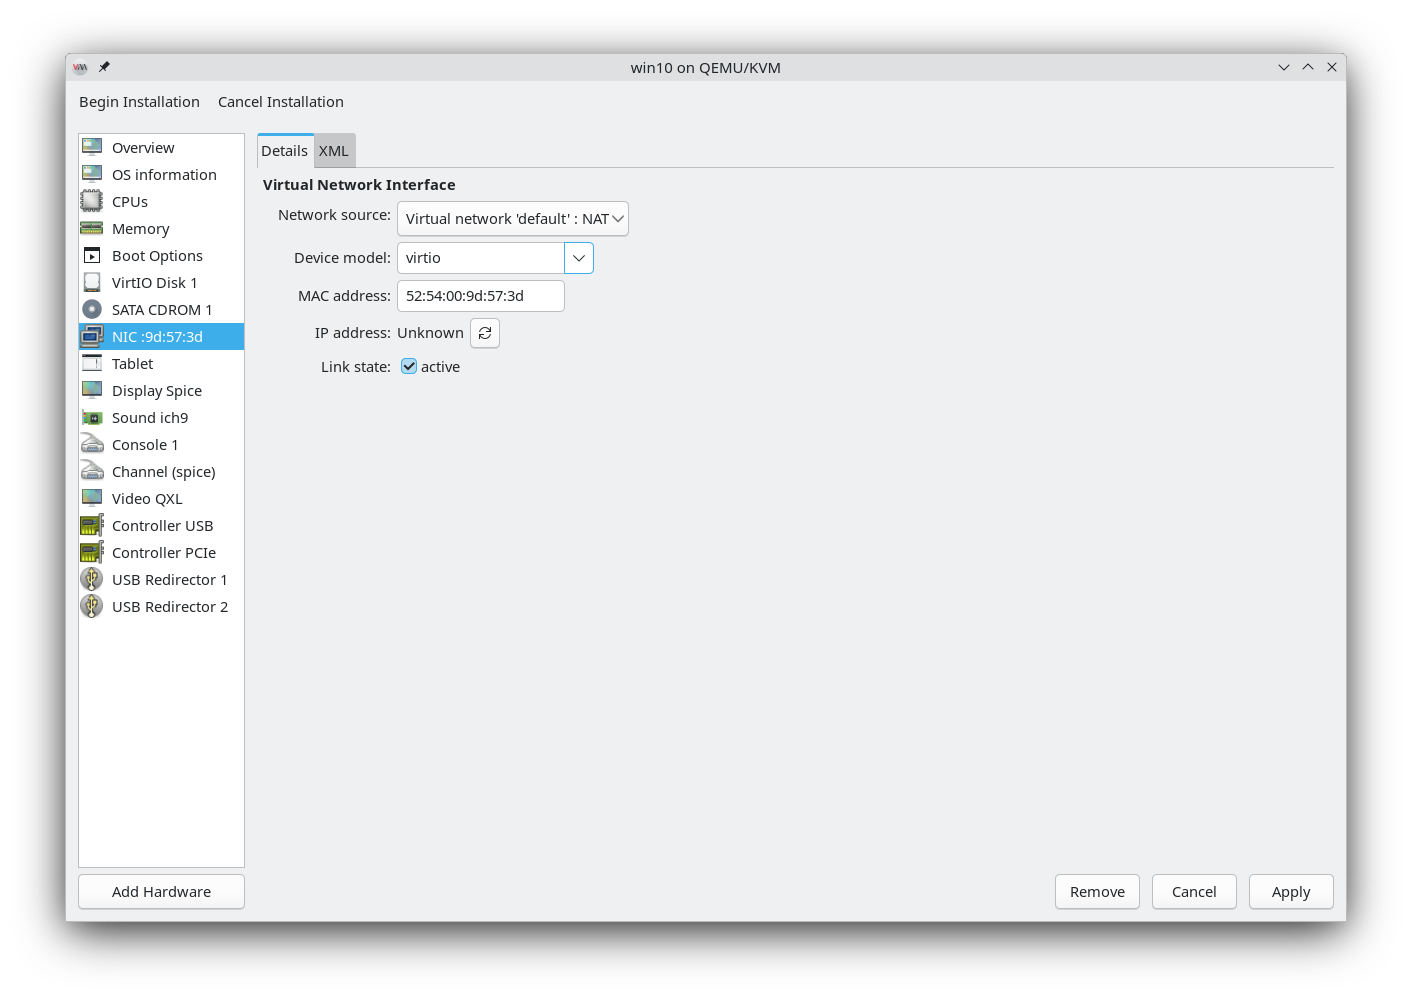
In networking, change the network to virtio as well:
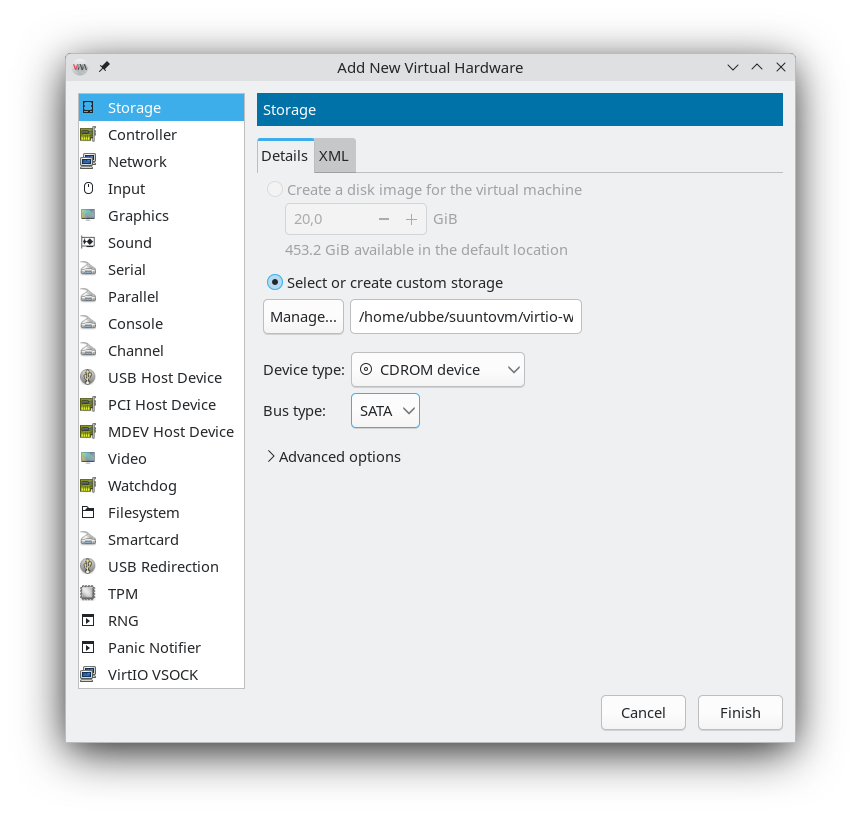
Now we’re going to add hardware 3 times. First add storage. Find the virtio.iso you downloaded earlier and select the type as CDROM device:
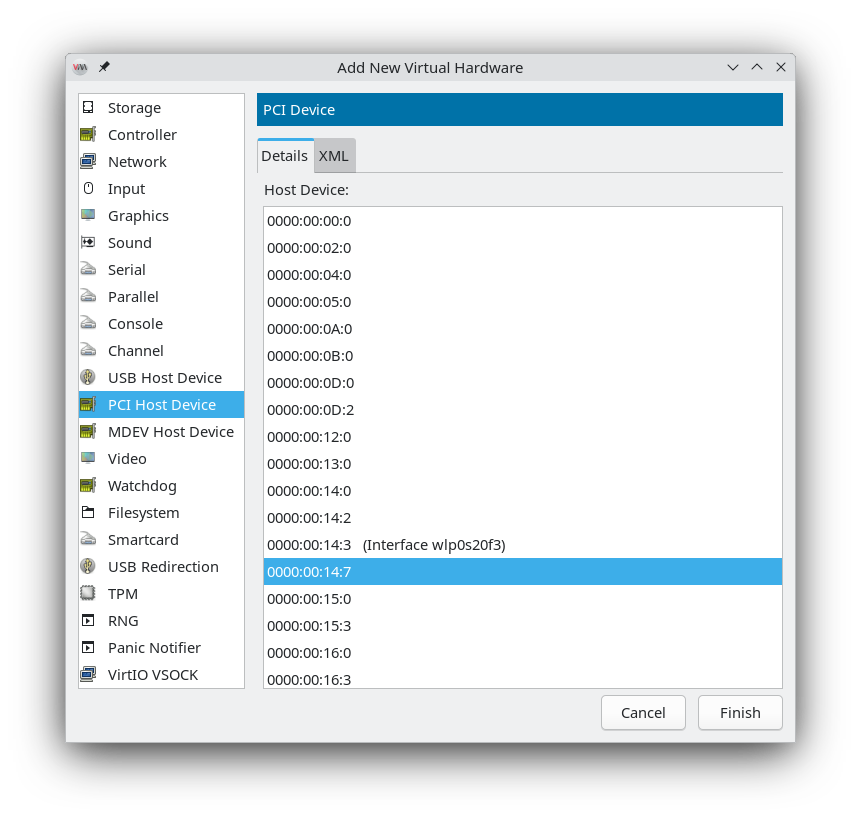
Then, add a PCI Host Device. You’re going to need that address you wrote down way back:
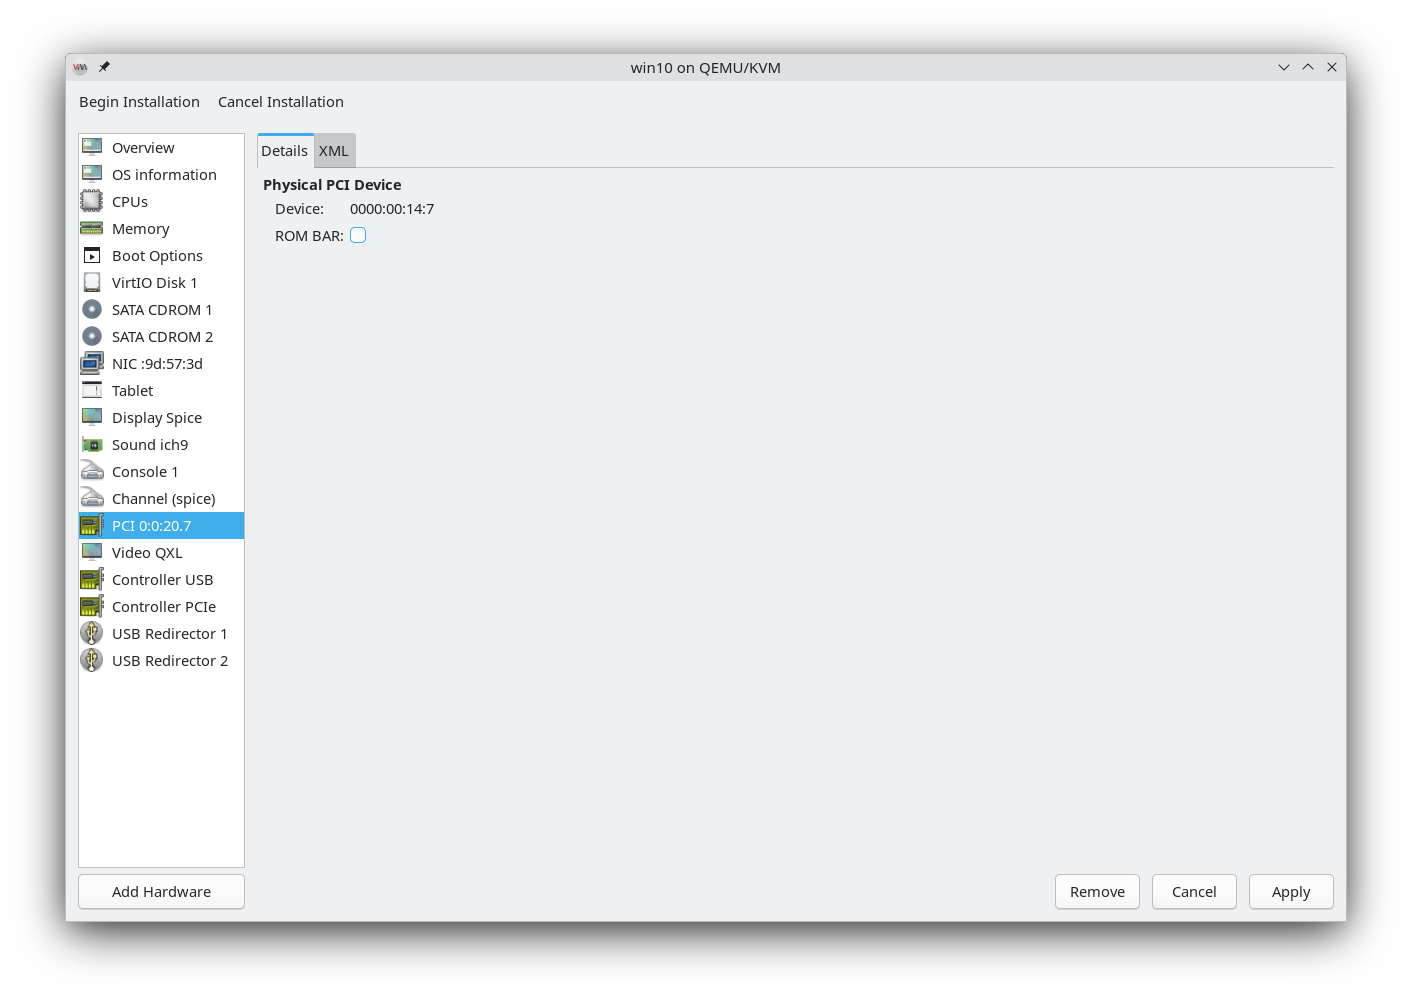
Make sure you go and uncheck ROM BAR for stability:
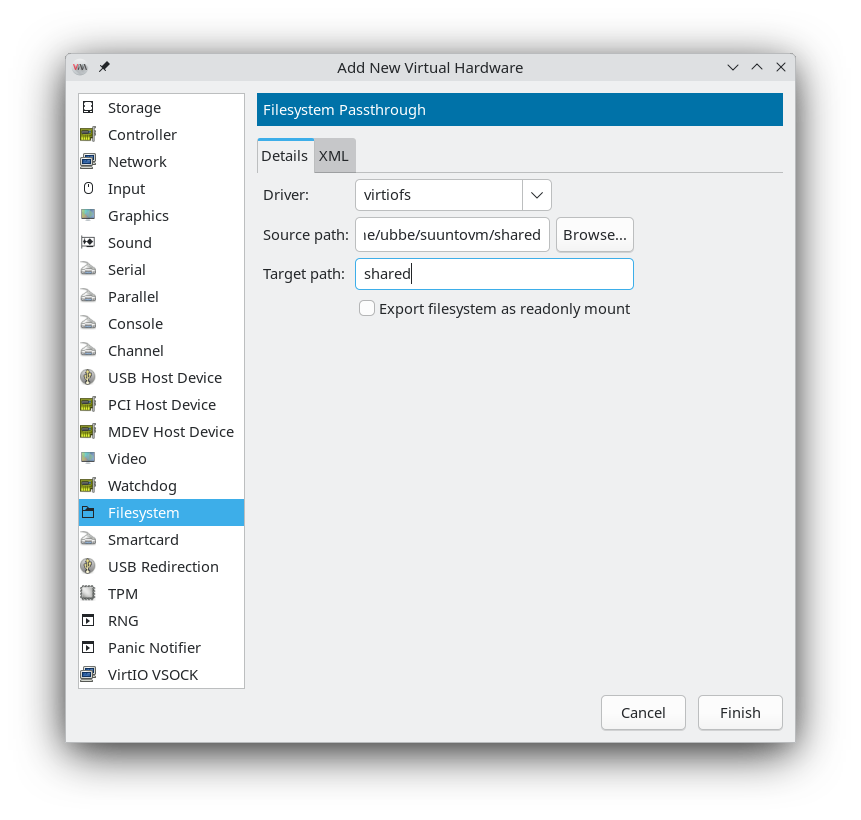
Finally, we want to add a shared folder aka ‘Filesystem’ so that you can send files between the host and the VM. Create a folder anywhere on your device and select it. Target path can be called anything:
You can now begin installation! Beware that there will be a ‘‘quick time event’’ when the VM boots where you need to click any key to boot the iso. Miss it and you will need to reboot the VM for a second chance.
5 Configuring Windows
Go throught the installation, choose no product key etc. I went with the option of Windows 10 Pro since I’m a pro
 The important thing is to choose custom install, then load driver, and from there the Windows 10 driver:
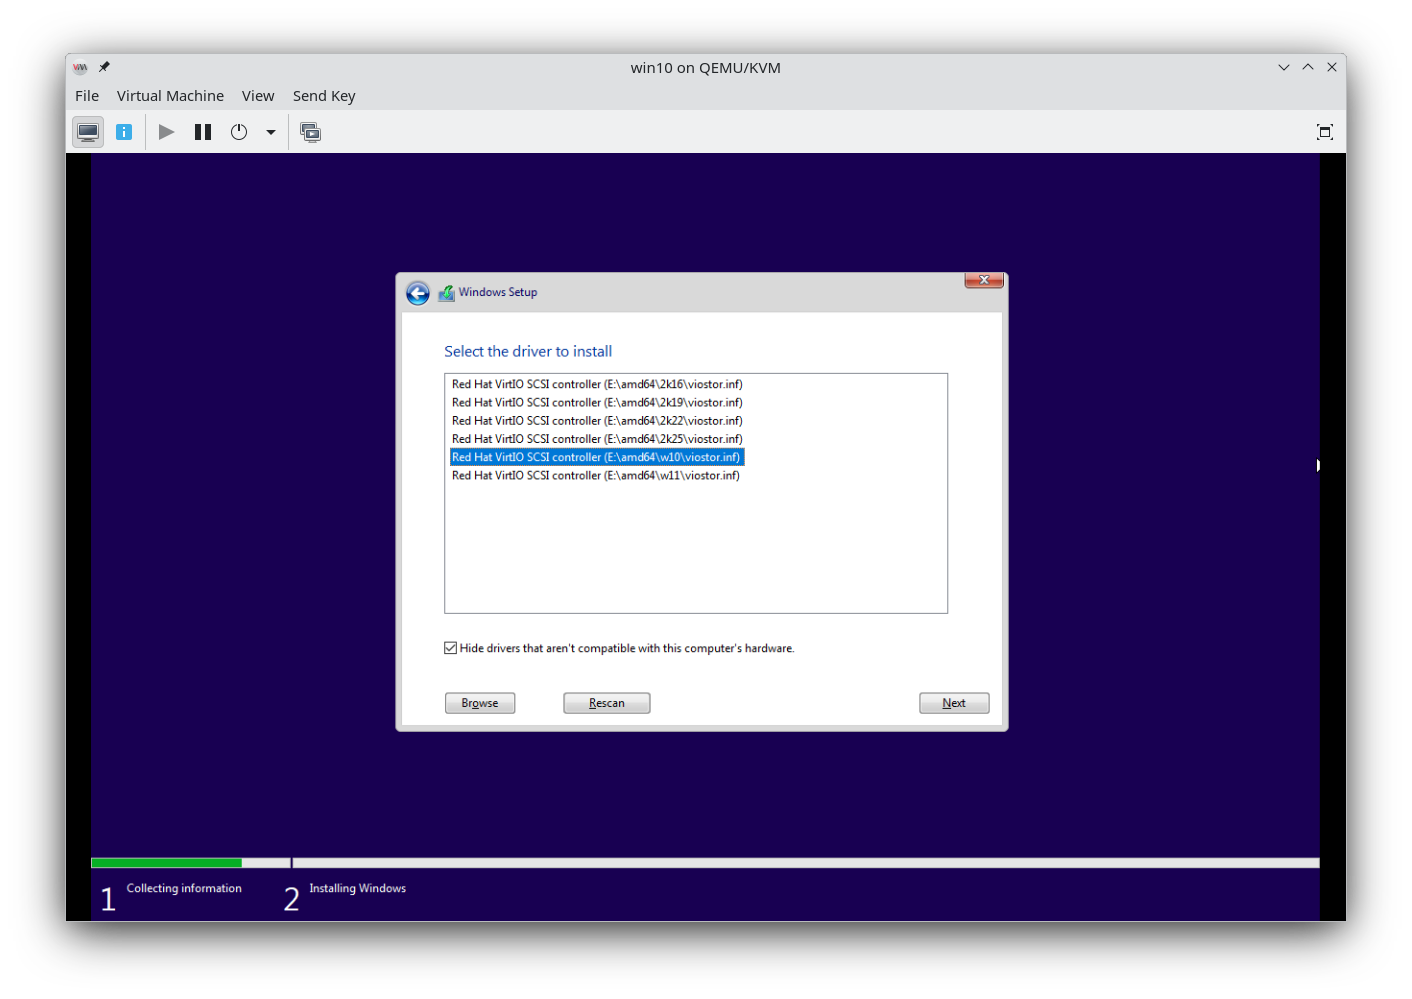
Now your main installation drive will appear. Windows will reboot on its own and then enter the second setup phase. Due to virtio we don’t have access to the internet, which is great! Windows will complain, just say you don’t have internet. It will reboot and complain again, but you must insist
Once the installation is done, inside Windows you should open the file explorer and go to where the attached drives are (‘‘This PC’’). There should be the virtio-win CD Drive you attached in chapter 4. Open it and install the guest tools inside. You will suddenly have a working internet connection inside the VM! Windows should tell you that it needs to reboot – do so.
We still need to fetch a couple of things inside the VM.
5.1 Winfsp
Get winfsp. After it’s installed, open admin cmd by writing ‘cmd’ in the start menu and pressing Ctrl+Shift+Enter. You should have gotten a User Account Control prompt to elevate your privileges. If not, close the command prompt and try again.
Inside the command promp, run:sc start VirtioFsSvcYou want the service to start automatically, therefore also run:
sc config VirtioFsSvc start= autoThe space after = is there on purpose. If these fail with some error codes, you either didn’t install winfsp or you aren’t running the prompt as admin.
File explorer should now have a new drive where you can put anything and it will appear on the Linux side, in the folder you chose when you added a filesystem at the end of chapter 4. Likewise, stuff added on the Linux side will appear instantaneously in Windows. Great for when you, for example, want to develop a project on Linux and then send it to your watch using the VM.
5.2 Bluetooth drivers
Yeah about that sending – you still need BT drivers! Since I have Intel, I went here, but you’re going to solve this one on your own if you have something else.
The end
That’s it. As a final tip, in the top bar with ‘
File | Virtual Machine | View | Send Key’ you may want to go to ‘View > Scale Display > Auto resize VM with window’ for a better visual experience.Get VS Code, install the SuuntoPlus Editor, connect your watch inside Windows, and get to developing! Cheers!
-
D Dimitrios Kanellopoulos pinned this topic on
-
For Linux users with Android phones, you can deploy with your phone. It works for now at least for my watch. Will not be updating the phone app even if any protocol changes from Suunto’s side break it, but it’s something.
-
@SyncBypass Great work! Successfully tested on my Race2.
Edit. There’s a problem; the date and time on my watch has changed.
-
@chus1962 whoopsie, it was replaying the sync message a bit too precisely. I trimmed that part out of the message, so there should be no more going back to April 29th 17.35!
-
@SyncBypass Perfect, thank you!
Hello! It looks like you're interested in this conversation, but you don't have an account yet.
Getting fed up of having to scroll through the same posts each visit? When you register for an account, you'll always come back to exactly where you were before, and choose to be notified of new replies (either via email, or push notification). You'll also be able to save bookmarks and upvote posts to show your appreciation to other community members.
With your input, this post could be even better 💗
Register Login